Monday, November 30, 2009

Gallery: Chairs


Sunday, November 29, 2009

Art Exchange: A Fun Idea

A few weeks ago I received an interesting e-mail.  It was a chain mail letter, but this one I didn't trash.  This one promised fun and art, so how could I refuse?  Called, "Tag your it! Art Exchange", the sender sends you a note asking your to join.  Your task if you choose to accept is to create any kind of small piece of art and send it to the name on the top of the 2 person list - in one week.  Then move his or her name to the top and add mine to the bottom.  Send the e-mail out to 6 arty-crafty friends and in a few weeks I should receive 36 pieces of art!  This idea intrigued me so I got busy, it took me a little over a week and a half, and then I mailed my art to a gal in California, and have sent out requestsI hope my friends can play!  Here's what I made.

I got the wood block (stamp for fabrics) at Maiwa.  When I spied the camels, I right away saw what I was going to do for a holiday card.  Here's how I did it:
1.  On heavy weight cotton rag watercolor paper, brush colors of acryllic paints, I used Liquitex's Ultramarine Blue and Dioxazine Purple.  Wetting a large brush with a gollpe of paint make large cross hatchings across paper with the Ultramarine.  Using a dryer brush and the Purple make more cross hatches but these are more feathery.  I was thinking of sand storms when I was doing this.  
2.  Using Colored Ink,  I used Windsor & Newton's color that looks like intense teal.  and an old tooth brush, dip the tooth brush in some ink and scrape the bristles against your fingers or a knife to splatter the ink.
Once your paper has dried:
3.  Using a metallic acryllic, I used Liquitex's Iridescent White, and a damp sponge.  Pour a bit of your paint out onto a sheet of paper/glass/plate and gently sponge the color onto the stamp taking care not to clog up the stamp.  Press your stamp onto your paper, three times.  It is important to test your stamping technique.  making sure you have the right amount of pressure so the stamp stamps completely.  My paper is hard so I put one thickness of a towel under the paper between the table so there is a bit more absorbsion.  Mostly I did this because my stamp is wood, not linoleum or rubber.
4.  Creating the gifts for the camels:  I love ARTchix Studio for collage sheets and I used two different collage sheets here.  The Party Crown  and the Heart and Soul Collage Sheet.
The party crown I cut the crown out with an X-acto, and then glued glass flats on the top three points, the heart I cut out of the sheet with and X-acto and then using two other fancy colored papers, red and purple cut another heart in purple paper just slightly larger than the heart and hen another in red slightly larger than the purple.  These were glued together using Zots, a hard sticky paper glue that makes what you glue stand away from the previous layer.  Then I glued a larger glass flat to the center of the heart. and glued that to the camel. The third gift is a vintage gold embossed paper bunny I got from Tinsel Trading Company.  The handsome bun is holding a square decorative glass, again glued to the bun's hands using a tiny bit of a Zot.
5.  Once the gifts are Zotted on, I cut out the entire shape of the card following the images of the camels and their gifts.  I also cut out the area where the reign is. 
6.  The three words on little flags are sewn onto the reigns with gold metallic thread.  I like the words Cherish, Love and Create, but choose your own.  Each letter is its own flag and using both a thin black finepoint maker letter the words, and the write over the black with a metallic gold pen.  And then just sew through the paper!
7.  Since my art card is folded it is nice to emboss a fold before you try to bend the paper.  I use a ruler and a dull back side of a knife to do this, making a groove in the paper, will make your creased fold perfectly sharp.
8. Sign your work! I did mine on the back with its title "Cherish, Love and Create".
9.  Don't forget to clean your brushes, sponge and stamp for another project.

"The Drive" East Vancouver's Murals


Once ready to set up for my class we headed over to Maiwa East where we were graciously hosted through Maiwa by the lovely Sue Lum.  She is a fellow textile fiend!  One of the things I most enjoyed about her home was her library.  She has an extensive collection of art, fiber, textile and cook books that just further transported me away.  Sue has her textile treasures (and fantastic cabinets and armoires that store her stashes) fill her contemporary home. Its color warm and rich, with dashes a ethnic wonderfulness thrown EVERYWHERE, I mean everywhere!  

Sue's neighborhood is called "The Drive".  So each night after my class, Tom and I would walk home, through the streets looking at all the fun things to see.  To say The Drive is multicultural is to say New England has colored leaves in the Fall!  Each night we ate at a restaurant of a different country.  As we strolled the streets, we discovered murals and more murals...some so inspiring I was inspired to document them.


Monday, November 16, 2009

Felting Tools (Or - how to be a teacher's pet)

As I think about my workshops this year, some reoccurring themes float to mind.  And even though I give handouts, I always get calls and e-mails looking for some specific things.  Fiber Supplies, The Fabulous Felt-O-Matic and other needle tools, so this post is for your quick reference.

I have 
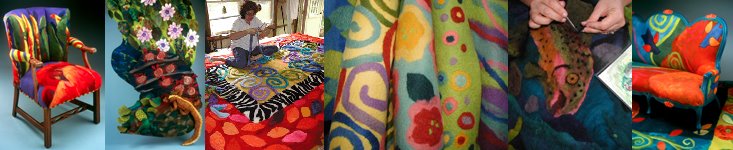
New England Felting Supply listed as a link to the right of the blog here.  I have been getting much of my fiber this past year from Chris White for teaching. 

The Fabulous-Felt-O-Matic, which I try to show in classes, because well, heck, it is great!  Small enough for the hobby felter and not a huge chunk of money for this cool tool.  Diane Stott is great for bringing it to us!  And here is a video of it's spectacularness.

Felting Needles, either New England or Sharon Costello of Black Sheep Designs

And lastly I have a small multi-needler which I brought with me to Vancouver,(Can't remember where I bought it) pulled it out of my box to show and let people try...it was a sad 6 needle hand-held needler, which used to have a top that screwed into it to keep the needles in place, and at that moment just red duct tape!  One of my students Ty Schultz, who apparently is a master of molding (moulding?), he and his wife Marcia do these very cool cast mold journal covers (It's a workshop!), and whom I think never sleeps, but sits in his casting studio all night trying to figure out how things work, and then makes them!  He very gently asked if I mended if he took it home over night to fix it for me.  Embarrased, I agreed.  He brought it in the next morning with a new fastener atop and in a traveling case!  (Pill bottle with foam inside for it to sit nicely snug into) He then made a mold of it and will be selling them!!!  You go Ty!!!

 
So as a souviner of my time in Canada he added a couple of coins to hold the wing nut into place...So Cool...

Thursday, November 12, 2009

Vancouver is a very COOL City

While we stayed in Vancouver, our first two days were in a hotel in downtown, where we of course walked around, went to Granville Island and ate at fun restaurants.  Check out what I spied in downtown and at farmers markets!


 These little ferries take you over to Granville Island, where we checked out both Locations shops of Maiwa Handprints, the shop and the dyeshop, and of course the huge farmers market.


  Some store fronts and yummy treats,  I spent a lot of colorful time in the Marimekko shop,


I had to include these lovely waffles, they were the dessert of our brunch on Sunday.  They were a bit different than the waffles I have had, they taste almost like they have a yeast base to them, so they and a bit on the savory side, and quite delicious.  our main dish was simplicity in an iron pan, a braised beef stew, with roasted potatoes, chuncks of cheese, with baby arugula greens all the lovely base for a pair of perfect eggs, and a Belgian Beer on the side.
We left full and happy, off to find the Dr Sun Yat Sen Chinese Gardens, which I will have a a seperate post as they were so removed from the city life and so beautiful.